


Hi there! Finally
back from my summer holiday. The weather was so good I did not manage to get
any hobby stuff done, so I was eager to get on with my hobby projects again.
Several of
the TSB members are currently working on Space Marine army’s. I will let them
post articles covering their own achievements, but have decided to make a small
tutorial on how I paint my Drop Pods, hoping some can benefit from my mediocre
skills. When it comes to ordinary colours I will give reference refer to the
“old GW colours names”, as the conversion tables can guide you on what to use, whatever
paint you choose (I use Vallejo).
First out I
build the Pod, and yes, I finish the whole model. I then I use GW Chaos Black
Spray to prime it, spraying inside first, closing the doors, spraying outside
and the top. Bottom and roof inside is done in a separate spray session.
After this
I mask of the engines, side panel metal plates and bottom of the doors and
bottom retro thrust area. With the doors closed, I then use Army Painter
Ultramarines Blue primer on the model.
Tipp: Make
sure to shake the can well before using Army Painters spray primers. Also move
the can quick back and forth 15 – 20 cm from the model.

After
removing the masking tape I dry brush the side of all the panels with a mix of
Ultramarines Blue and Ice Blue mixed 1:2. Then I go over the model with Chaos
Black mixed with water 2:1, tidying up all the eras that have gotten blue spray
on them by mistake.
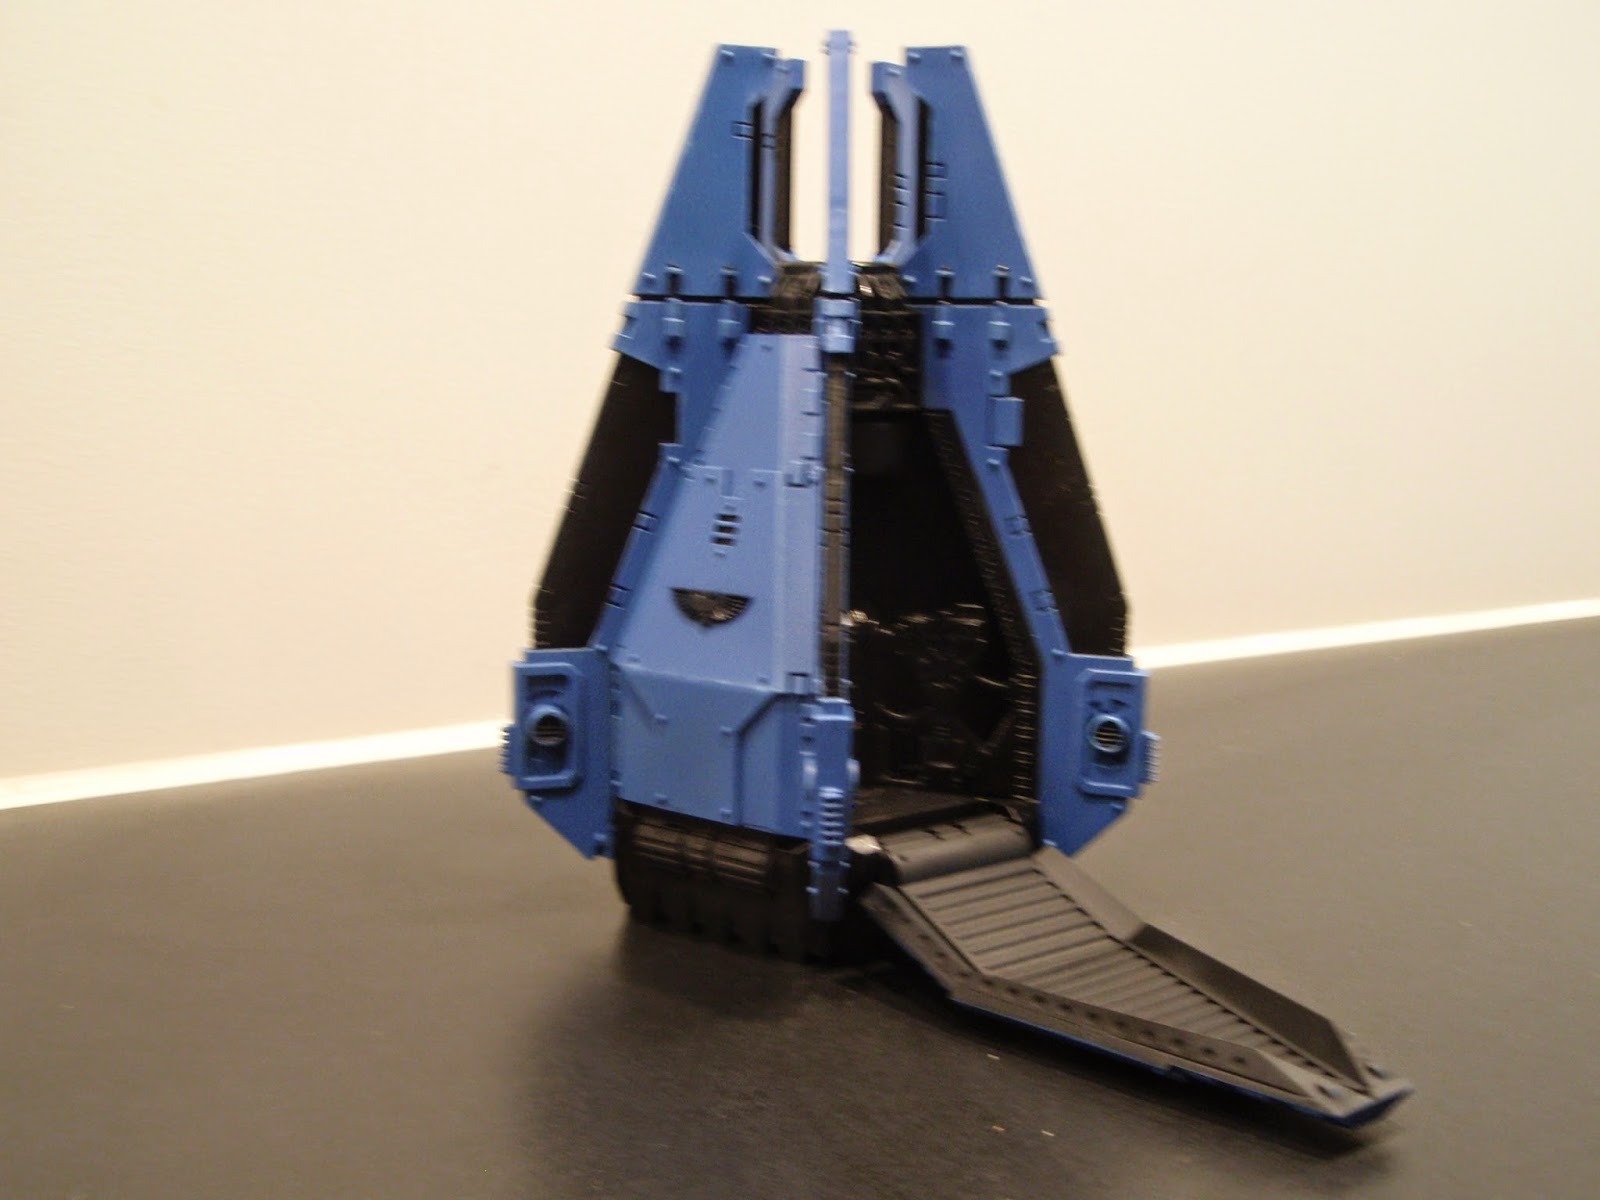
I then dry
brush GW Tin Bits and Scorched Brown mixed 1:1 on the engines, bottom retro thrust
area and metal side panels. Scorched Brown is dry brushed around vents, in all
the corners and on selected eras around the doors (veer and tear, chip markings
etc.).

I dry brush
the interior, metal plates on the side panels and the inside of the doors with
Chainmail. A mix of Bolt gun Metal and Chainmail 1:1 is applied in thin uneven “spots”
on top of the brown areas, concentrating on the edges of the doors and all the
corners (brown patches – to represent chipping, tear and wear).
I mask the
side of the doors, and apply Sunburst Yellow in thin layers 4 times (thinned
1:1). I remove the masking tape. I fill in the boltholes on the side of the
doors and apply some brown patches. Then I apply the silver mix on the brown
patches.
I wash the
interior using Badab Black (Nurn Oil) thinned in water 1:1, and paint the
screens and buttons on the panels using Snot Green, Sunburst Yellow and Blood
Red (all diluted 1:1). All the other metal areas (not the brown patches) are
washed with a mix of Brown Ink and Badab Black thinned with water (1:1:2).
The eagles
are painted Codex Grey, and highlighted with Skull White, both diluted 1:1. I
also paint some scripts on the side panels.

The floor
inside the model and inside of the doors is dry brushed using Sand Yellow, the dry
brushed using Bleached Bone. The side of the doors, the floor inside and the inside
of the doors are washed with Brown Wash thinned 1:2.
I paint
Gloss Varnish where the transfers are placed, and cower the decals with Gloss
warmish when dry.
Tipp: Using
Gloss warmish on decals is mandatory for later stages using my technique.
I use a
hobby knife carving/drilling some bullet holes. I don’t do this on the doors
since the pods arrive so fast I recon they will take hits once they are on the
ground (and doors ejected). The holes are painted in the Tin Bitz/Scorched
Brown mix. When dry, I paint the holes with Chainmail diluted 1:1.
I then
cover both the inside and outside of the model with GW Satin Varnish spray
(thin cote).
Tipp: Using
satin warmish is decals mandatory for later stages using my technique.
At this
stage the model looks like the one to the left in this picture. But I want to
take it one step further so that it looks like the model to the right when
finished.

To dull
down the blue colour, shade the metal and holes, I use AK Interactive (MIG)
Enamel Wash Brown Blue (for panzer grey vehicles). The Enamel Wash comes in
various colours, but I find this best on blue and grey surfaces. I use a Tamiya
mixing pot, and add Enamel Wash and Turpentine rectified approx. 1:10. Place
the lid and shake well.

The Enamel
Wash is painted on all the blue surfaces (also over decals and the eagle), and
on the engine and retro engine sections as well as the metal side panels (Tin
Bitz/Scorched Brown areas). Important: After applying, wait 5 minutes, dip a
brush in Turpentine and lean the decals. You can use the brush over the decals
2 max 3 times before the Gloss Varnish succumbs to the turpentine!
Tipp: Do
this step using a Vapour Mask and in a ventilated area. Clean the brush in Turpentine
thinner, and wash the brush in warm water with some kitchen soap, and then
using cold water. Also make large pots of the mix ensuring the same mix are
used on the models. Finally, every now and then, when painting, shake the
bottle – important – as the paint pigment will start to fall to the bottom of
the jar within 10 – 15 minutes. Use a large Wash brush.
After 24
hours I then paint the whole of the model with satin Varnish thinned 2:1. I
highly recommend using Vallejo Satin Varnish.
When dry
the model look like this.


Happy
painting everyone, hope this can help someone out thereJ
Cheers,
Ørnulv


