Pages

31 December 2014

Jørn's 2014 in review

4 kommentarer
It's time, once again, to have a quick look over my shoulder to see what I happened this past year in the hobby, and perhaps compare it to what I had planned to do. Last year's review and pledges for this year can be found here.

I'll leave it to the other pledgers to go through their own year, but for my own part I fear I have more failures than successes to report:

Finishing the Basilica de Veteris.
If this project has moved anywhere, it has moved backwards. I removed the entire structure from its elavated Jackofoam base over the summer, but never decided on (how to construct) a replacement base. Since the structure is so large, I will have to divide it into four separate pieces for storage. I don't even dare think about transportability at this point.

Finishing another 1500 point/ of Traitor Guard, to bring them to at least 2000 points.
I haven't run the numbers for the models I do have, but I'm not sure if I have 500 points of Astra Militarum Traitor Guard. Then there's the new list in Imperial Armour 13... I should really study that a bit closer, to decide on a theme that fits the models I have on hand - both Guard and Chaos Space Marines.

Playing 40 games of 40K.
Not quite... I've played 30 games of 40K against almost half that number of opponents. Eight of those games were played at Adepticon in Chicago, and only ten were played using the 7th edition ruleset. I have been turning down at least half a dozen game offers lately, because I've wanted to focus on preparations for next Adepticon 2015.

Finishing the Chaos Warhound Titan, and play at least one game of Apocalypse with it.
While we never got around to playing any Apocalypse battles this year, I did manage to finish my Warhound Titan. It has been languishing downstairs in 'the cave' all year, staring at me every time I poke my head in the door.

+ - + - +

So what did I produce this year? One superheavy and fifteen Terminator'ish models, it seems...
I've got to be able to do better next year!!!

14 December 2014

BJ Brush Cleaner

4 kommentarer
-->
Not a very exiting post, but hopefully useful.

It works – it works – it does not work; It can be used to - dry brush something! Familiar with this feeling?

A while ago, I noticed a ”brush care” video at the ”Awesome Paintjob” channel. I have over 20 brushes at any given time, and although I try to maintain them well, I am still experiencing ”split ends” and ”rugged dry brush bristles".

My Kolinsky brushes costs between 50 -100 NOK each. "Bad bristles" does not only make the paintjob more difficult, but makes it costly as well.

-->
 
So I thought it was a god idea to try out this product. A mug with hot water, some patience while rubbing the brush against my palm – and suddenly – they bristles where all smoth and to a point again.


I recommend this product,

Cheers
Ørnulv

23 November 2014

Black Templars – Drop Pods

2 kommentarer

Ork lady going – mad?  

Deciding upon a Space Marine chapter for Adepticon 2015, it was only proper to turn 360, and choose a chapter I always have admired and think looks cool - The – Black Templars! Not finished with the army yet – but getting there! The pods are now finally finished:)


More to come,
Inger Helene’s servitors signing off (fore the time being)

9 November 2014

Ultramarines Ironclad Dreadnought / Venerable Dreadnought

4 kommentarer

I never seem to be able to finish my Ultramarines army. I guess there are so many bits and left overs, that I am compelled to try to use them before moving on to new projects.

I went through my bit box, and found that I had enough parts to make yet another Dreadnought (# 4). My previous ones consist of two ordinary Dreadnoughts, and one Venerable Dreadnought, with all the various weapons magnetized. Then I got the idea of a storyline linked to my last Librarian build; A couple of weeks ago I finished a “pimped” / “vane” Librarian with lots of scrolls, Servitor Skulls and a beige robe. What if I made a model representing him honoured with “Dreadnought armour”? My Librarian being quite taken with “bling”, I am sure the Tech Marines and Servitors where only happy to apply them selves in order to make him stand out on the battlefield!

Making the option for him to be fielded in a Venerable dreadnought was a no brainer, however, I wanted to try to make one build I did not have in my collection – an Ironclad Dreadnought. I gave nothing against GW, I love the models and the game, however – I do want to put a limit to purchasing models and part, deciding to try to add various bits left over from previous projects in order to make a model that could represent an Irenonclad Dreadnought.

First out I had to change the Sarcophagus, deciding to use venerable parts in order to make him more “bulky”. I also added skulls on top of him to i) create bling and ii) that could represent the Ironclad “grenade launchers”.  I had a large left over Forge World Skull that I thought would look cool on the front armour.

I filed down the front armour plate, filled it with Tamiya putty, sanded it level, and glued on the skull.

Some work in progress pictures:
Preparing parts to build the body

Various bits – choosing parts in a creative, as "I go along process"

The skull and front plate (before sanding)

It’s coming along
I fitted extra plating to both arms in order to make the model more bulky than the normal build, also representing - “Iron clad”. Now how to scratch build a Seismic Hammer? I turned the Missile launcher arm in the opposite direction (from left to right arm), removed some parts, and used the Drill bits from the Centurion kit, some left over cables and the landing gear from the Storm Eagle flyer set. I magnetized a Heavy Flamer and a Meltagun so they can be fitted under the arm. And of course, servo skulls, old left over Forge World Ultramarines ornaments, and finally scrolls where added.

And this is how the finished model looks like:


All arms are magnetized, and he can also be kited with a Lascannon, Assault cannon with flamer ore a Multimelta. On these arms I only added scrolls and some more subtle ornament parts, in order to be able to keep the basic idea of this old Librarian now being a Venerable Dreadnought.


What to do next?

I have 5 Sniper Scouts, but want to build them with Bolters, and am working on how to refit the Rifles with Bolters. But then again, there is an old industrial complex with narrow corridors and confined compartments that are sending out a distress signal…

Cheers,
Ørnulv

2 November 2014

Word Bearers Chaos Terminators - third batch (Architecture of Aggression XXXVII)

1 kommentarer
...and it's a whopper!


Alongside the Obliterators featured last tuesday, I've been working on a full squad of Chaos Terminators with Power Mauls and a few Combi- and Heavy Flamer. I've also completed the two models above to enable the use of two of the default five-man squads I've been using since I painted up the first batch of 'Annointed"'way back in the summer of 2009 and the smaller addition three and a half years ago.


26 October 2014

Hive Fleet Behemoth – Hive Tyrant and Tyranid Warriors update

2 kommentarer

Greetings! I have been caught up with work and miscellaneous other projects, so I have been quite unproductive hobby vice lately. Feeling my motivation is about to return, I started working on a small project, refitting a unit of Warriors and a Winged Hive Tyrant with Devourers.


Funny how “small projects” turn out to be something quite different; I had to tear of the wings in order to fit new arms, this being the old metal model with lots of pinning, green stuff etc. – well, I finally finished the monstrosity.

Since this summer I have played my Tyranid army. Although they are not as competitive as they where in 5th edition, I still have fun playing them, much more then when I read the new Codex when it first came out, I must admit I got caught up in all the rant…

Anyway, focusing on “fun gaming”, I played a great game against a veteran Necron player a couple of weeks ago. I presented two armies my opponent could choose from, and I was really happy when he choose to go against a horde swarm.
The opposing forces

Hive Fleet Behemoth advances on the Necron line

First contact

Metal and Chitin almost annihilated each other


This was a particularly bloody battle. Almost no models left on either side. Very fun. When we left the gaming table we thought the Necrons had won, but during a drink after the game we had forgotten First Blood and Linebraker, securing a Tyranid victory by one small point. Honestly, it could have gone either way, a game to remember!

Cheers,
Ørnulv

14 October 2014

Word Bearers Obliterators ...again! (Architecture of Aggression XXXVI)

3 kommentarer
Must... Obliterate...


Has it really been four years since I completed the previous batch of Obliterators? Back then, we still wrote in Norwegian, so an auto-translated version might be (slightly!) more accessible to our international readers...

(Apologies for the Omnissiah's repeated insults to both languages.)


This latest group of inductees into the Obliterator Cult brings the total number up to nine. That means I can max out the available Heavy Support slots in a Combined Arms Detachment with Obliterators. I'm sure everyone else at TSB is pretty exited about that prospect! :D

Until next time...


JørnN

4 September 2014

Space Wolfs Grey Hunters

1 kommentarer

Preparing for Adepticon 2015, Trond decided to field a Space Wolf army.

Her are a picture of the painting scheme we have developed.

Best of luck Trond, 2 down, 38 to go in addition to the Pods, I think they look great!

Cheers,
Trond and Ørnulv

3 September 2014

Ultramarines Librarian

5 kommentarer

Final preparation for Adepticon 2015!

I will once again bring my Ultramarines. But I decided to kit out my Warlord different from my current build.

A little inspired by “White Dwarf” – Warhammer Visions – Kit Bash Sections, I decided to se if I could build / convert a model that would represent my proud Librarian in a fashionable way. Hence, it was time to open the bit box.

The “Black Reach Captain” was the basis for my model; Altered backpack with Ultramarines symbol, custom made Combi Melta, Auspex, extra Purity seals and Servo Sculls.
I decided to use Dark Angels “scripts” to represent the "essence of the Librarian", lots of written material, also adding some chains and gems.

And this is how my new Librarian looks like. Behold – “Librarian FalconWolf” - ready to lead the Ultramarines into battle!


Cheers,
Ørnulv

27 August 2014

Ultramarines Drop Pod

4 kommentarer

Hi there! Finally back from my summer holiday. The weather was so good I did not manage to get any hobby stuff done, so I was eager to get on with my hobby projects again.

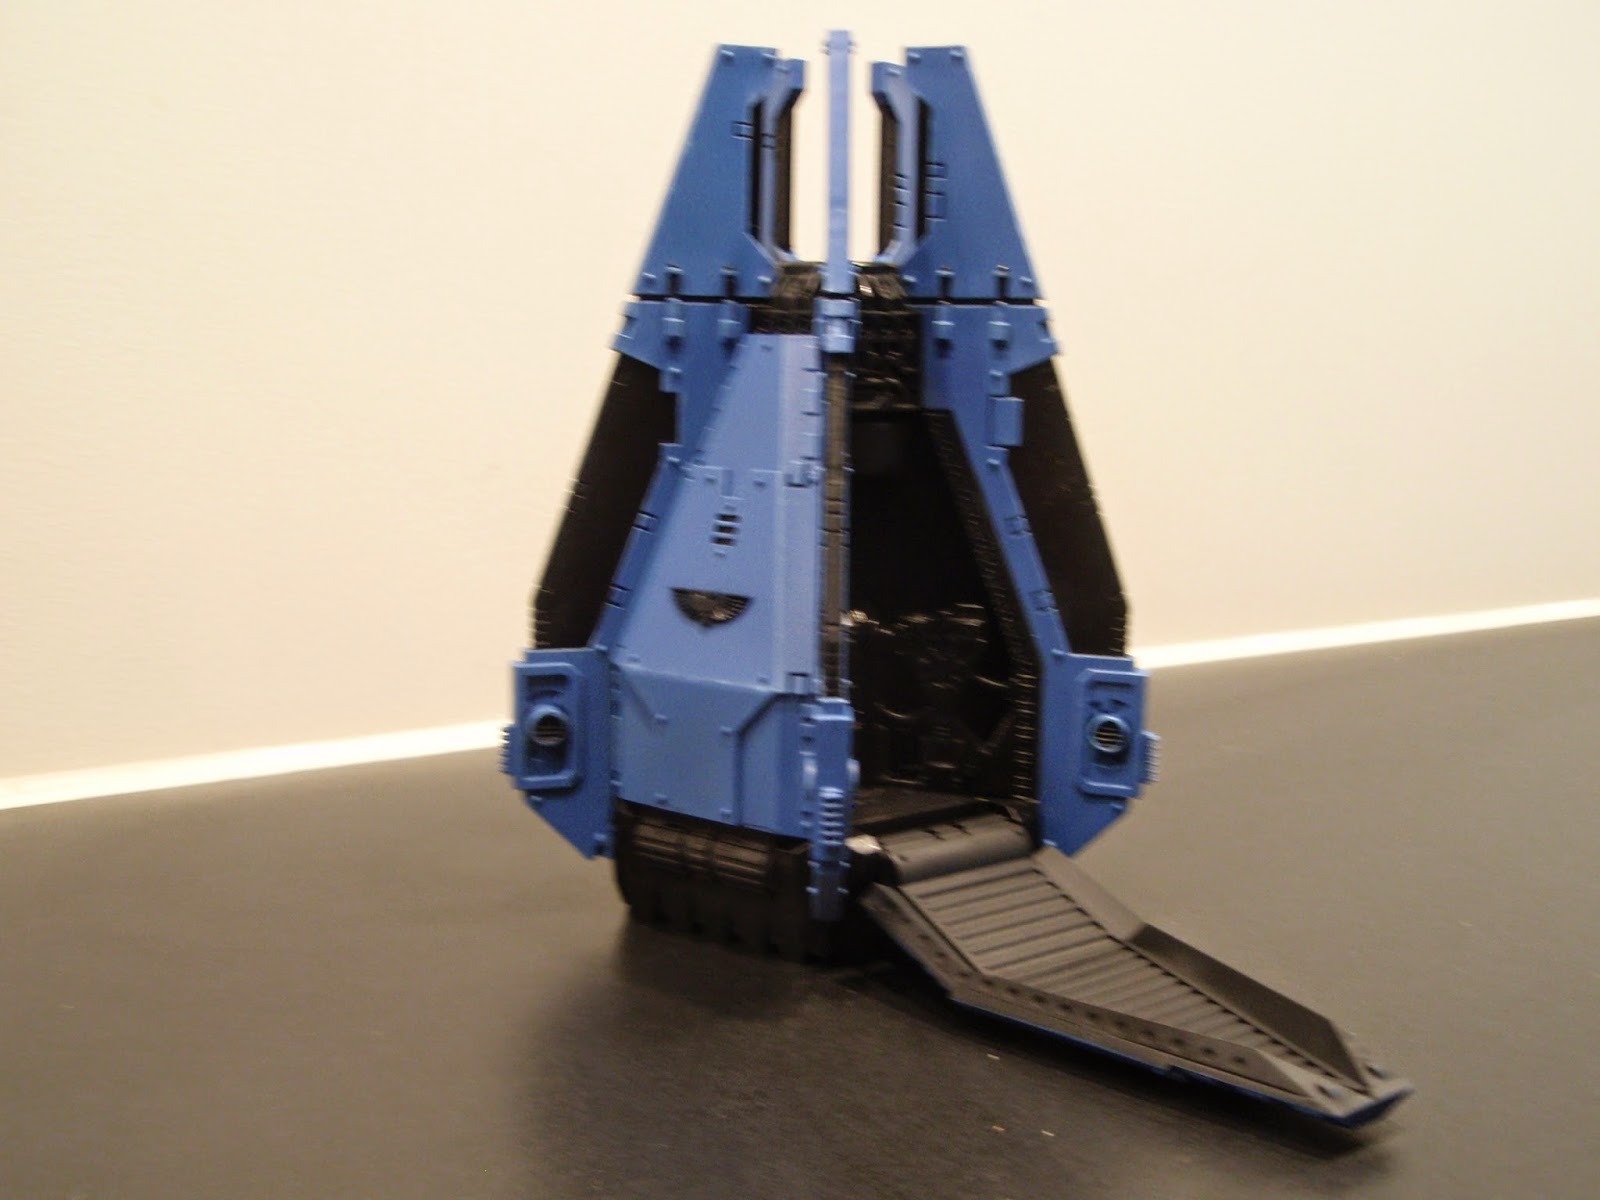
Several of the TSB members are currently working on Space Marine army’s. I will let them post articles covering their own achievements, but have decided to make a small tutorial on how I paint my Drop Pods, hoping some can benefit from my mediocre skills. When it comes to ordinary colours I will give reference refer to the “old GW colours names”, as the conversion tables can guide you on what to use, whatever paint you choose (I use Vallejo).

First out I build the Pod, and yes, I finish the whole model. I then I use GW Chaos Black Spray to prime it, spraying inside first, closing the doors, spraying outside and the top. Bottom and roof inside is done in a separate spray session.

After this I mask of the engines, side panel metal plates and bottom of the doors and bottom retro thrust area. With the doors closed, I then use Army Painter Ultramarines Blue primer on the model.

Tipp: Make sure to shake the can well before using Army Painters spray primers. Also move the can quick back and forth 15 – 20 cm from the model.

After removing the masking tape I dry brush the side of all the panels with a mix of Ultramarines Blue and Ice Blue mixed 1:2. Then I go over the model with Chaos Black mixed with water 2:1, tidying up all the eras that have gotten blue spray on them by mistake.

I then dry brush GW Tin Bits and Scorched Brown mixed 1:1 on the engines, bottom retro thrust area and metal side panels. Scorched Brown is dry brushed around vents, in all the corners and on selected eras around the doors (veer and tear, chip markings etc.).

I dry brush the interior, metal plates on the side panels and the inside of the doors with Chainmail. A mix of Bolt gun Metal and Chainmail 1:1 is applied in thin uneven “spots” on top of the brown areas, concentrating on the edges of the doors and all the corners (brown patches – to represent chipping, tear and wear).

I mask the side of the doors, and apply Sunburst Yellow in thin layers 4 times (thinned 1:1). I remove the masking tape. I fill in the boltholes on the side of the doors and apply some brown patches. Then I apply the silver mix on the brown patches.

I wash the interior using Badab Black (Nurn Oil) thinned in water 1:1, and paint the screens and buttons on the panels using Snot Green, Sunburst Yellow and Blood Red (all diluted 1:1). All the other metal areas (not the brown patches) are washed with a mix of Brown Ink and Badab Black thinned with water (1:1:2).

The eagles are painted Codex Grey, and highlighted with Skull White, both diluted 1:1. I also paint some scripts on the side panels.

The floor inside the model and inside of the doors is dry brushed using Sand Yellow, the dry brushed using Bleached Bone. The side of the doors, the floor inside and the inside of the doors are washed with Brown Wash thinned 1:2.

I paint Gloss Varnish where the transfers are placed, and cower the decals with Gloss warmish when dry.

Tipp: Using Gloss warmish on decals is mandatory for later stages using my technique.

I use a hobby knife carving/drilling some bullet holes. I don’t do this on the doors since the pods arrive so fast I recon they will take hits once they are on the ground (and doors ejected). The holes are painted in the Tin Bitz/Scorched Brown mix. When dry, I paint the holes with Chainmail diluted 1:1.

I then cover both the inside and outside of the model with GW Satin Varnish spray (thin cote).

Tipp: Using satin warmish is decals mandatory for later stages using my technique.

At this stage the model looks like the one to the left in this picture. But I want to take it one step further so that it looks like the model to the right when finished.

To dull down the blue colour, shade the metal and holes, I use AK Interactive (MIG) Enamel Wash Brown Blue (for panzer grey vehicles). The Enamel Wash comes in various colours, but I find this best on blue and grey surfaces. I use a Tamiya mixing pot, and add Enamel Wash and Turpentine rectified approx. 1:10. Place the lid and shake well.

The Enamel Wash is painted on all the blue surfaces (also over decals and the eagle), and on the engine and retro engine sections as well as the metal side panels (Tin Bitz/Scorched Brown areas). Important: After applying, wait 5 minutes, dip a brush in Turpentine and lean the decals. You can use the brush over the decals 2 max 3 times before the Gloss Varnish succumbs to the turpentine!

Tipp: Do this step using a Vapour Mask and in a ventilated area. Clean the brush in Turpentine thinner, and wash the brush in warm water with some kitchen soap, and then using cold water. Also make large pots of the mix ensuring the same mix are used on the models. Finally, every now and then, when painting, shake the bottle – important – as the paint pigment will start to fall to the bottom of the jar within 10 – 15 minutes. Use a large Wash brush.

After 24 hours I then paint the whole of the model with satin Varnish thinned 2:1. I highly recommend using Vallejo Satin Varnish.

When dry the model look like this.


Happy painting everyone, hope this can help someone out thereJ

Cheers,
Ørnulv