Pages

28 February 2011

Word Bearers 'Thousand Sons' (Architecture of Aggression XXVI)

3 kommentarer
Another Troop choice this month: Counts-as Thousand Sons with Aspiring Sorcerer.


In my army, I'll be referring to them as First Acolyte Zelos and the Dark Apostle's Honour Guard. The shields and the halberds are all from the Chaos Knights kit for Warhammer Fantasy. I think it gives the squad a more 'heavy' and 'ponderous' feel to them compared to normal (Chaos) Marines.


Now, the only god-specific Troop type I'm missing is a squad of Plague Marines. I have a few ideas, but I'm not at all sure how I'll represent the T5 and FnP without doing some serious conversion work...

26 February 2011

I now pronounce you...

0 kommentarer
I got this from a colleague at work earlier this week, and thought I'd share it for a bit of weekend levity. My colleague told me the pic is of her sister's (pause for effect) wedding cake a couple of years back.


Anyone else got something similar?

24 February 2011

750 points Quickstep

5 kommentarer
Not quite fed up with each other's company after the weekend-trip to London, Trond and I decided to give the 750 points missions for Winter War 8 a go last night. It's amazing just how quickly those points are spent, though. We both had to give it a fair number of tries before we came up with something we thought might be playable.

Autarch
- WJumpGen, MBlasters, Pwpn

Dire Avengers (Exarch + 5)
3 Guardian Jetbikes
3 Guardian Jetbikes

Warp Spiders (Exarch + 4)

Fire Prism
Fire Prism
   Dark Apostle (Sorcerer)
- Mark of Tzeentch
- Warp Time & Doombolt

Thousand Sons (Asp.Sorc + 8)
- Doombolt
Rhino

Obliterators (2)
Obliterators (2)


Scenario 2 - Return to the Eye

A special rule for this scenario allows you to "choose one friendly, non-vehicle unit to remove from the table and immediately redeploy using the Deep Strike rules."

Primary objective is to control D3+2 objectives.
Secondary objective is to kill the enemy's highest point cost psyker. (...or highest point cost non-vehicle non HQ model, if there is no psyker.)
Tertiary objective is Kill Points.

With Dawn of War deployment, Trond elected not to deploy anything after loosing the roll off for initiative and having to go first. I deployed the Dark Apostle with the First Acolyte and the Apostle's Honour Guard in their Rhino next to the ruin and central objective. (That's how I plan to write the Thousand Sons squad into my Word Bearers Host.) The Obliteraters was placed into Reserve, to be able to Deep Strike in.

The Fire Prisms took out the Rhino in round two, after a bit of a chase around the corner of the Ruin. Nine out of ten models inside got wounded, and I failed five out of nine 3+ saves... The first Obliterator squad arrived and failed to kill the three Jetbikes right in front of them, only to roll two sixes the next turn to save themselves from another Fire Prism hit with two sixes.


Mid-game the focus shifted to the other flank, where the other Obliterator squad also failed to kill the Jetbike squad in front of them. In return, the Warp Spiders killed one of the Obliterators, before the Autharc then assaulted the remaining one. Luckiily he failed to wound it, and The Apostle and Honour Guard assaulted and killed the Eldar leader next phase.

From there on Trond backed off, seeking to consolidate his position and claim the two objectives my one Troop squad didn't control. In turn five the two remaining Obliterators teleported over to the Dire Avengers and doused them with fire from their Heavy Flamers. Trond finally failed a save, leaving even the Exarch a pile of charred bones.

At that the game ended

The two forces held an objective each, the Chaos Sorcerer and Warp Spider Exarch both still lived but the Eldar had lost two Kill Points to Chaos' one.

Chaos
Eldar
4
0

Scenario 5 - Adversaries

Primary objective is Kill Points.
Secondary objective is to kill the opposing commander.
Tertiary objective is to kill the opposing commander with your commander.

Trond won the initiative this time, and elected to stay on the side of the table he already knew. He set up his forces in his left hand table quarter, forcing the Chaos forces to set up in a ruin on the other side of the central ruin.


This scenario had a special rule where the Commanders have to do a Scout Move to close thhe distance between them. Nothing much came of that as we both felt it more prudent to keep our HQs out of the sights of the opposing force's heavy weapons, and had deployed our models a little ways back.

Trond opened the ball by offing two Obliterators. The other two promptly replied by wrecking the skimmer. The Dark Apostle and Honour Guard fired at one of the Bike squad but only killed two. Unfortunately, they passed their Break test and probptly hid in stead of running off the table. None of us were willing to stick our proverbial necks out after that, and the rest of the game we pretty much just tried getting a shot in without suffering a firestorm in return.


In the end, the remaining Obliterators managed to squeeze a (really rather unsporting) lascannon shot between a couple of rock coloumns to take out the last Jetbike and net Chaos a second Kill Point. The Apostle and Honour Guard assaulted and killed the Dire Avengers before retreating back into the ruin, just to keep Trond from trying something if the game went long.

None of the army commanders had bit it (even though it was a close call for the Chaos Sorcerer who had joined the two Obliterators that died in round one).

Chaos
Eldar
10
0

22 February 2011

40K Abroad - GW Plaza (again) - London

2 kommentarer
Trond and I went to London with our respective 'She Who Comes First's. Needless to say, hobbying was not the focus for this trip but we boys were allowed to go geek out for a few hours saturday morning while the ladies went to Madame Tussauds.

So off to The Plaza we went. As we entered the GW store there, we were greeted by Mathew Greaves and spent perhaps half an hour chatting about this and that while we picked out a thing or two...

('Honoured Imperium', a Painting Station, the two latests WDs, 'Prospero Burns' and 'Blood Gorgons' for me. A Wave Serpent, some Rangers/Pathfinders, a Painting Station, a few paints and 'Path of the Warrior' for Trond.)

As we were leaving, I remembered that I'd neglected to take any pics. On the table just inside the entrance they had a table with some Ork-defiled Imperial ruins. Nice idea! Perhaps something to consider for you, Inger Helene? (Pics at the bottom of the article.) They also had a rather nicely done Storm Raven they let me examine.


Now, I've been in the camp that didn't care for this new model at all. Words like "Pommes Fries basket" have been used, but perhaps it's the photographers at GW that need their work revised in stead of the model design department. After seeing the model in person - poised level to the ground in stead of leaning forward, and with the landing gear retracted, I'm now of the opinion that "it doesn't look anything as bad as the promotional pictures would have you believe."

...and with official and sanctioned rules published in WD3xx, you just might se one or two blue ones on this blog before too long.


15 February 2011

ØRNULVS FEBRUARY 2011 PROJECT Re-revisiting the Ultramarines 2.

1 kommentarer

Even if I can field the whole of 2. Company, I don’t have the number of special weapons, heavy weapons and Sgt with weapon combos that I wound like.

Working from my new army list, I have purchased and built "my last" supplement of tactical marines… (I can hear Jørn LOL) ;)

First out – Tactical marines. I have tried to give them different poses then earlier build. Anyway: 2 marines with Meltaguns, 2 with Heavy Bolters, 2 with Lascannons and one with Missile Launcher. With this reinforcement I can field each squad with Flamer, Missile Launchers or Heavy Bolter, and between 2 and 4 of them with Plasma Guns and Plasma Cannons, ore Meltaguns and Lascannons.

Second out – Devastators. My 2. unit of Devastators are currently equipped with Lascannons and Plasma Cannons (or one Missile Launcher). With this upgrade I can field 2 Devastator Squads with Missile Launchers. While I am at it,I also built a new Sgt.

Finally – Tactical Sgt. Two Sgt with Power fist and two with Combimelta.

With the winter holiday, I guess my March project will be to paint them…

10 February 2011

SHADOW IN THE WARP # II

6 kommentarer

Having defeated Kharn the Betrayer and his CSM (se battle report 29. December 2010), Hive Fleet Grendel started to devour everything in its path as it spread across the planet. If Chaos where to regain control over this once great Imperial outpost, the forces of Chaos would have to act!


1750P – THREE OBJECTIVES


Primary Objective (10p); Listening Tower (on a D6 result of 5-6 a piece of area terrain reveals being a listening tower that each side wants to capture and control)

Secondary Objective (6p); Man Down (each side tries to control/rescue a stranded spy – a suitable marker is placed in the enemies deployment zone before deployment)

Tertiary Objective (4p); Grind them to a Halt (point for each vehicle or monstrous creature destroyed/killed)


DEPLOYMENT


Man Down markers; Tyranid, second floor northwest inside “Sanctum”, Chaos, ground south-centre inside a “Fuel Depot”.


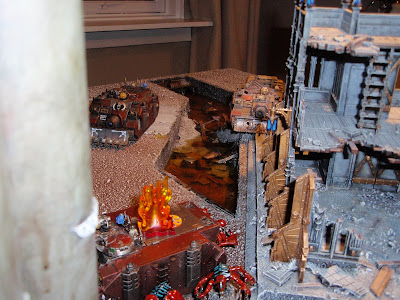
A Rhino enters the battlefield in centre, and the unit disembark behind it. Centre-west, another Rhino, also with the unit disembarked behind it. In centre, between them in cover, a Chaos Lord.


The Tyranids vanguard units enter the battlefield from the south (table side). One unit of Gaunts emerges inside the large “Manifactorum” in the south-centre, and one inside the “Sanctum” to the west. Southwest, behind "Sanctum", towers the will to control both units – a Winged Hive Tyrant.

It was still. It was dark….

TURN 1


The rest of the Tyranid army arrives from “reserve”. Southwest, moving towards “Sanctum” and the stranded Tyranid Spy, a small unit Genestealers, a Trygon Prime and a Tervigon. Centre, smashing their way into the “Manifactorum”, a Zoanthrope and a Tervigon. South East, partly behind “Manifactorum”, a Trygon Prime and a Winged Hive Tyrant. In the East, behind barrels and rubble, a unit Genestealers and a Zoanthrope. The Vanguard Gaunt unit surrounds the Tyranid Spy. The Gaunt unit inside "Manifactorum" searched the structure (D6 5) and found "The Listening Tower"! It was to dark for them to pick out any targets to shoot at.


In the dark a Landraider with Chaos Berzerkers entered the battlefield from the Northwest, threatening “Sanctum” and the Tyranid Spy in the Second floor. In North-Centre entered yet another Landraider, its dedicated occupants (Terminators) held in “Reserve”. To the Northeast, alongside the channel, overcoming all obstacles, two Vindicators. The Chaos Lord joined the CSM in centre, and the CSM in Centre-west embarked their Rhino.

The forces of Chaos had acted…


TURN 2


To the West the small Genestealer unit entered “Sanctum”. The Tervigon spawned 12 Gaunts that moved towards “Sanctum”. The Tervigon itself, and The Trygon Prime, moved northeast remaining in cover from most of the big guns. The Zoanthrope inside “Manifactorum” moved toward the CSM centre Rhino. The Tervigon inside “Manifactorum” Spawns another 12 Gaunts that moved to secure the surroundings of the factory. The Tervigon itself retreats south and takes cower behind the large structure. To the centre, the Hive Tyrant lands behind the “Fuel Depot”, close to the "CSM Spy", the Trygon Prime lurking behind it. To the east the Genestealers approach the structure that once where known as “Terminatum”, the Zoanthrope adjusting its position to back them up. The Tyranids manages to blow up the Rhino in West-Centre, and to destroy the second Rhino. The will of the hive mind (Paroxysm) triggers every nerve and pain receptor in the Lord and his unit, leaving them with reduced WS and BS (1).


The Chaos Lords and his CSM unit redraw north and are backed up with a Landraider. The Vindicators to the East heads South/Southwest. The Landraider to the northwest drives up to “Sanctum”, and the Chaos Berzerkers disembarks. The CSM in centre-west hold their ground. Suddenly the city is lit up by fire from Meltaguns, Bolter fire, Shells and Lascannons! The Zoanthrope inside Manifactorum falls, and the Hive Tyrant in the Centre loses three wounds! The Chaos Berzerkers charges and wipes out the Gaunt unit protecting the Spy inside “Sanctum”, and consolidates behind the building close to their Landraider. Chaos is in a good position!


TURN 3


The small Genestealer unit inside “Sanctum” swiftly moves towards the Chaos Berzerkers, and are joined by a unit of Gaunts. The Winged Hive Tyrant fly over to the corner of the building, gaining line of sight to the Chaos Berzerkers. In west-centre the Tervigon spawns a new unit of Gaunts (but rolls a triple), that move west to aid the Nids positioned inside “Sanctum”. The Tervigon and Trygon Prime move towards centre. To the east The Winged Hive Tyrant fly over the Fuel Depot, and takes position in front of the Chaos Lord and his CSM unit. The Genestealers inside “Terminatum” close in on the same unit from the east. The Zoanthrope runs southeast trying to find cover. In centre the Trygon Prime move north towards the centre-west CSM unit. The Tervigon moves in behind him. The Trygon Prime and Tervigon to the Centre-west open fire against the Chaos Berzerkers killing a couple of them. The Tervigon and Trygon prime to the Centre-south opens fire against the CSM in Centre-west, also killing a couple. The Hive Tyrant to the northwest casts “Paroxysm” at the Chaos Berzerkers. The Hive Tyrant in centre unsuccessfully tries to regain lost wounds (lost three out of four…) by extracting the "life force" from the Chaos Lord and his unit of CSM (Leech Essence), but manages to Paroxysm them. The Genestealers and Gaunts inside “Sanctum” charges the Chaos Berzerkers, lost the fight so that the Genestealers had to redraw, but the Gaunts manages to hang on, denying the Berzerkers the possibility to embark their Landraider the following turn. In centre, the badly wounded Hive Tyrant and the Genestealers assault the Chaos Lord and his CSM. Thanks to “Paroxysm” and the “Whip Lash”, the Genestealers and the Winged Hive Tyrant managed to break the unit, leaving only the Lord and two CSM alive (fleeing north), the Hive Tyrant giving its life in the battle. The Genestealers consolidate west, trying to avoid the two Vindicators approaching from the east.


The Chaos Lord and his surviving CSM continues to fall back to the north. The Vindicators to the east moves west. The Landraider in centre adjusts its position, getting ready to fire at the Trygon Prime arriving from South-Centre. The Landraider to the Northwest pivots to open fire against the Hive Tyrant supporting the attack on the Chaos Berzerkers. A bright light, and in dead centre, besides the CSM unit in Centre-west, a unit with Terminators materialises. Again the battlefield is lit up by fire. The Hive Tyrant to the northwest is wounded several times, as is the Tervigon southwest and the Trygon prime south-centre. The Vindicators open fire killing several Genestealers. The Chaos Berzerkers finish of the Gaunt unit.

TURN 4


The Remaining Hive Tyrant hisses! Instantly the Gaunt unit inside “Sanctum” moves towards the "Tyranid Spy", the Trygon prime and Tervigon to the centre moves north. The Genestealers that fell back from the Chaos Berzerkers does not regroup, and falls back south. To the east, the Genestealers moves west, trying to maximize use of cover – hiding from the Vindicators. The Trygon Prime in centre moves towards the centre and closes in on the newly arrived terminators and the remaining CSM. The Tervigon in centre Spawns a new unit of Gaunts that heads straight for the centre. The Gaunt unit spawned turn one inside “Manifactorum”, also closes in on centre. Bioelectric pulse from The Trygon Prime, and Cluster Spines from centre northwest Tervigon, kills several Chaos Berzerkers. The Hive Tyrant casts “Paroxysm on them”. In centre, the Gaunts open fire against the CSM without big success. The Trygon Prime fleet (runs) towards the Terminators and the CSM unit in centre-west. The Zoanthrope manages to kill a CSM in the Centre. Feeding time!!! The Trygon Prime in Centre advances – straight pass the Terminators – and reaches the CSM. A large unit of Gaunts attacks the same unit from the west. It is a short, but bloody battle, The Trygon Prime with only one wound left, and a couple of Gaunts locked in mortal combat with a few CSM. To the northwest, the Hive Tyrant assaults the remaining Chaos Berzerkers, killing all but one, but the Hive Tyrant is down to one wound. At least the nearby Landraider will not be able to open fire next turn….


The Terminators moves as close to the Trygon Prime in centre ass possible. The Vindicators to the east reaches the “Fuel Depot”. To the North, the Landraider drives around the Hive Tyrant locked in combat facing the Monsters to the west centre. The Vindicators kills several Genestealers, leaving only one alive, and killing the remaining Zoanthrope. The Landraider in centre-north and northwest wounds the centre Trygon Prime and Tervigon. It is not enough! The Terminators assault the Trygon Prime (with only one wound left), but has to assault through difficult terrain! The Trygon Prime directs all its attacks against the Terminators, wounding all five of them, and – killing all of them! The Trygon Prime and remaining Gaunts are locked with the last two CSM. The Hive Tyrant to the northwest kills the last Chaos Berzerker in close combat.


TURN 5


The Hive Tyrant to the northwest moves east trying to find cover. The Trygon Prime and the Tervigon in centre-west moves north against the empty Chaos Berzerker Landraider. The Tervigon in centre spawns another 12 strong Gaunt unit, the unit heading northeast in order to create a living barrier against the Landraider in centre north and the Vindicator to the northeast. The Tervigon itself crouching behind one of the fuel towers nearby the "Chaos Spy". The Genestealers to the south of “Sanctum” finally regroups. The Gaunts inside “Sanctum” moves in and around the Tyranid Spy. The Trygon Prime and Tervigon reaches the Chaos Berzerker Landraider, smashing it apart! The Trygon Prime and remaining Gaunts kills the last of the CSM in centre. The newly spawned Gaunt unit assaults the Vindicator to the east of the “Fuel Depot”, but are outside range of the hive powers of the Tervigon, and the Gaunts therefore does not have the strength to damage it. Only tanks left to devour….


The Landraider in north centre pivots against the badly wounded Trygon Prime. The Vindicator to the southeast drives at full speed against centre, the other adjusting its position. With a roar the heroic Trygon Prime in centre is blown apart from heavy Bolter fire and Lascannon fire. The Tervigon and Gaunts is wounded by the Vindicator behind the “Fuel Depot”.

A dice is rolled – a new turn.


TURN 6


The badly wounded Hive Tyrant fly due west trying to find cover from the remaining Landraider. The Tervigon and Trygon Prime to the west move at full speed towards centre. The Gaunts and Genestealers adjust their position trying to shield the “Listening Tower”.


The remaining Landraider goes after the Hive Tyrant and opens fire! Twin Linked Lascannon, one hit, one wound - the last Hive Tyrant is killed. The Vindicator to the east moves straight west, heading for the “Listening Tower”, popping smoke. The other Vindicator kills some Gaunts.

A dice is rolled – one last turn


TURN 7


The Trygon Prime reaches the centre-north Vindicator, tearing it apart. The Tervigon advances on the Vindicator that popped smoke to the east, but does not manage to destroy it.


The Landraider pivots and opens fire, but the remaining monsters have to many wounds left. The remaining Vindicator tank shocks the Tervigon, who decides to move aside, and the Vindicator crashes into the “Listening tower” (contesting it). Damn!

It is over!


RESULTS


Primary Objective (controlling the Listening tower);

Hive Fleet Grendel 0 – Word bearers 0

Secondary Objective (guarding the “Man Down”):

Hive Fleet Grendel 6 – Word bearers 0

Tertiary Objective (Grind them to a halt)

Hive Fleet Grendel 4 – Word bearers 0

Total: Hive Fleet Grendel 10 – Word bearers 0


The Hive Mind is pleased; this planet is ready to be devoured by Hive Fleet Grendel! Or is that humming sound, that is coming from those dark green and white "discs" that hovers over the ground, a new threat?


MOMENTS TO REMEMBER


Jørn; tank shocking turn 7 into the primary objective, denying the Tyranids complete victory!

Ørnulv; killing all 5 terminators in one go with a Trygon Prime with only one wound left!

4 February 2011

Secure and controll & Recon WW2011 mission 3

2 kommentarer
Time to face of with Jørn again, this time on a tiny little gaming surface known as 4x6 feet gaming surface... After playing Apocalypse with 5500 pts, 1750 is kinda, well not as time consuming to say the least.
So. 1750 pts Word Bearers vs 1750 Biel Tan Craftworld Eldar. Mission - 6 random obejctives, 1 and 2 are objectives, 3 and 4 are worth nothing, 5 and 6 are booby traps.. So taking objectives could be a kill surprise!

Secondary mission - recon.
Jørn wins the roll of and decides to go first. Deploying a strong right flank with 2 vindicators, a landraider with his chaos lord and berzerkers, and 1 sqd of marines in a rhino. The center is reinforced with terminators in another landraider, supported by 10 marines in another rhino. Hard as nails!

So what to do? Well. Vindicators - don`t like them. But with only 24" range and deployed on my far left flank... easy. Just keep out of range. So I deploy my forces on my right flank, using range as cover for my vehicles.

Jørn starts by advancing with his whole army towards 4 of the total of six obectives, claiming 2. At the end of the movement phase it`s time to take a look on what the objectives are. The berzerkers aren't afraid of anything, and with bravado picks up the counter and. Ka-booom!! Booby trapped! D6 WOUNDS on the unit, and he rolls a 5! 2 berzerkers bites the dust. The rest of the berzerkers tries to warn their fellow bretheren about to pick up another counter... Ka-boooom! again!!! Another 5 wounds this time on a chaos marine sqd, killing another 2. What a great start for me! Shooting. No surpirse the vindicators are well out of range and both landraiders deployed smoke in the movement phase.

My turn. Hold it, holdt it. Not much to say in the movement phase, jut som minor adjusments, and time to open fire. My first fireprism targets a vindicator/landraider/rhino/marinesqd all crammed together with focus on the vindicator. HIT! S 9 vs arm. 13. Penetrating hit - no cover. Destroyed! My next prism targets the same bunch minus a vindicator, but only manges to wound 3 marines, who in turn makes 3 coversaves. Brightlances and starcannon on rhino in senter. After a bit of shooting - destroyd! the landraiders are sadly intact as their smoke grenades dissipates and Jørn picks up the dice.

With two burnig wrecks and more objectives close by, Jørn continues his advance. The berzerkers and chaos lord embarkes their land raider and starts to close the gap to the eldar line of vehicles. The so far unscaved chaos marine sqd moves up to another objective, aaaand... Empty! Now I have two obejectives close to me, and one is close to berzerkers in their landraider. Jørn fires his twin lascannons from his second landraider which remained stationary, clipping one fireprism, but protected by it`s holofield only suffers a crew sheaken.

Eldar turn 2. both my reinforcements arrive. 2 warp spidersqds. One with exarch, the other only 9 spiders. Fast jump infantry with a bucketload of S6 shots. The sqd without the exarch scatters 5 inch of target, but it looks close enought to - yes you guessed it :) rear armour of the second vindicator. Armour value 10... The other one tries to get in range of the chaos sqd at the center of the table, but scatter 8 inch and into difficult terrain... And the only one to fail his dangerous terrain test is my powerblade shooty sniky exarch... and they are out of range.. That said, time to reduce som armour to molten slag. 6 Firedragons get their opportunity and the pilot of their waveserpent takes them well within range of the landraider containing the blood crazed berzerkers. Other movement. My shaken fire prism manouvers out of the way to give a clear line of fire for my second one. It targets the chaos marine sqd with a dispersed blast, killing one unfortunate marine. My two twinlinked brightlances does nothing to the second land raider so its up to the dragons. Who as usual lives up to their reputation of beeing a surpreme tank killing unit, exploding the land raider, killing another two berzerkers, leaving an angry chaos lord, walking for the rest of the game. What an insult for a Mon-keigh in terminator armour. And unsuported, my fire dragons looks kinda small compared to the massive bulk of the Chaos Lord.. ouch time...
My 9 warpspiders behind enemy lines, are all found to be in range of armour 10 - rear armour, vindicator. After the dice have been tossed Jørn is left with - a piece of terrain. Immoblised, and weapon destroyed. The next best thing to wrecking it.

Chaos turn 3. Jørn is forced to react on the eldar incrusion behind is lines, and the cost for beeing a bit uncarefull with my warpspiders will cost med dearly. The Land Raider with terminators backs about 5 inches and 5 terminators disembark, looking at 9 warpspiders who I kinda forgot to move out of harms way. Damn Damn Damn!!!! The chaos marine sqd on Jørns right flank turns on it`s heels and goes after the second sqd of spiders. The Chaos Lord leaves the berzerkers who in turn, makes it to the fourth objective marker. And it`s nr 1. Scoring objective.


Now I have to find the one closest to me to at least draw the primary objective.
Shooting. Twin lascanon ws waveserpent. Shaken... Chaos marine sqd vs spiders. 3 dead from pistol fire. Assault. Chaos lord with twin lightning claws vs 6 firedragons. Run away after loosing 3 dragons. Terminators vs 9 warpspiders. 8 dead spiders!!!!!! ouch and the last one... runaway!! 9 chaos marines vs 6 warpspiders. 6 dead spiders. So in one fell swoop I lost 24 aspect warriors. That`s what you get when your highly specialized elite warriors, are challenged with somthing outside their aspect.
Things are looking up for Jørn..

My turn 3. Time to get Jørn back in his corner, or at least keep him there. What do I have left. 2 twin linked brighlances, 2 Prism cannons and 1 twinlinked starcannon currently shaken. Oh and by the way, 10 dire avengers and 10 stormguardians with flamers/warlock w/heavy flamer. So - take out his remaining armour - Land raider. My two waveserpents move into position and both troop sqds disembark, both in range of the last two objectives. And luck is on my side, the storm guardians picks up the right one, leaving them stationary for the remainder of that turn, but my Dire avengers are now free to fire.
What is left of the chaos marine sqd in the center, about 6 og 7 marines, have been doomed by my farseer at the beginning of the turn. BLADESTORM. Not to impressive in the end, only killing 3 marines with 15 wounding hits. But they are down to 4. Twin linked shuriken catapult, twin linked brightlance x 2 against the same unit - in cover, leaving 2 marines standing. Fire Prism vs Land Raider. The Fire Prisms linkes up, gaining s 10 and AP 1 and even reroll to hit, but it is not needed. The shot scatters 1 inch, still on target, and the force of the focused laser from the arcane Eldar weapon burns straight through the corrupted Mon-keigh armour, and blows the large tank to bits, leaving a gaping crater. This leavs the Chaos terminators just outside of really anything remotly threatning to my
fragile guardians. Only chaos marines left, who are close enough given 2 turns and a rhino. The rest of the chaos army is just too far away:)

Turn 4
Jørn moves up towards my deployment, trying to get as much as possible inside my deployment. But without transport in the vicinity, it is slow work.
The remaining Rhino pushes on towards the eldar guardians, but is a bit too far away. The fleeing warpspider is thank shocked and destroyed. The two remaining marines tries to get closer but is stranded in the middle of... Oh shit land, but close enough to assault my starcannon waveserpent. Assault - no hits... thank you.

Turn 4
Securing a d.... no maybe a victory!
The farseer dooms the remaning two marines, cast fortune on his wavserpents and the Dire avengers embarks, and the serpent promtly moves totally out of harms way and ready to move into Jørns deployment in turn 5. A bit close to his terminators who are stranded back there.
One Fire prism also sees this and moves flat out and up to the speeding serpent. The second prism hangs back for dealing with the rihno. My storm guardian now takes with them the objective and moves away. My empty wavserpent blocks the path for the rhino targeting it also with its twin brightlance. The now fully functional wavserpent with starcannon positions its self targeting the chaos marines left in the open - doomed. Death by starcannon.

Turn 5 Jørn tries to get inside my deplomyent, but only his berzerkers makes it. I move flat out with 1 fire prism and one waveserpent, securing 2 units in his deployment. The last Fire prism moves across the table and is left out of harms way but outside Jørn`s deployment. Jørn rolls for random game length and the game ends.

Eldar victorious!

That was close!!

1 February 2011

Mechanicum - TSB on Twitter

0 kommentarer

As of yesterday, there's a new way you can keep tabs on us and what we're up to... Team StormBolter now has a Twitter-account.

This gives you another/alternate way of being notified when we're doing something you can view online, such as a live game on our Ustream.tv channel (More on this once we can fix a few quality issues.) or when there's a new blog post up.

In time, I'm sure we can come up with a few other uses for the account as well. Feedback appreciated, as always.